Tips & Tricks
How to Layer Heights in Your Holiday Village Display – Create Depth Like a Diorama Artist
Village Lighting 101: Tips for a Cozy Glow in Your Miniature Display
Repairing Broken Lemax Pieces – A Collector’s Field Guide
Display Smarter, Not Harder
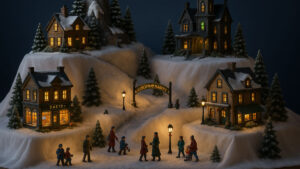
Planning your village layout ahead of time saves time and frustration. Sketch a basic map or use painter’s tape to define spaces before setting pieces. Group buildings by theme or elevation for visual variety—use books, boxes, or tiered platforms to create natural depth and dimension. Think of it like a stage: every piece plays a part.
Lighting Like a Pro
Lighting can make or break the mood. Use soft white LEDs under cotton batting for a snowy glow, or place warm fairy lights behind windows for that lived-in look. Hide wires using foam core boards or mini fences. For collectors with large displays, consider a smart plug or dimmer for full control.
Creative Touches That Wow
Want to go beyond the standard setup? Try DIY accessories like faux brick paths, lamppost conversions, or tiny handmade signage. Some collectors even incorporate sounds, motion, or interactive elements using Arduino or plug-and-play kits. These touches aren’t necessary—but they sure make your display memorable.
Storage and Organization
After the holidays, careful storage preserves your investment. Label boxes clearly, separate cords from buildings, and avoid overstacking. For extra protection, use egg-crate foam or wrap fragile pieces in felt. Storing your village isn’t just cleanup—it’s setting the stage for next year.
Fixes and Touch-Ups
Chipped a roof or snapped a figurine? Don’t panic. Many minor issues can be solved with model glue, acrylic touch-up paint, or replacement parts from craft stores. When in doubt, reach out to the collector community—someone’s likely fixed the same issue before and is happy to help.


